Planting · 10 min read
Composting at Home: A Beginner's Guide
By House of Horticulturists · 6 September 2026
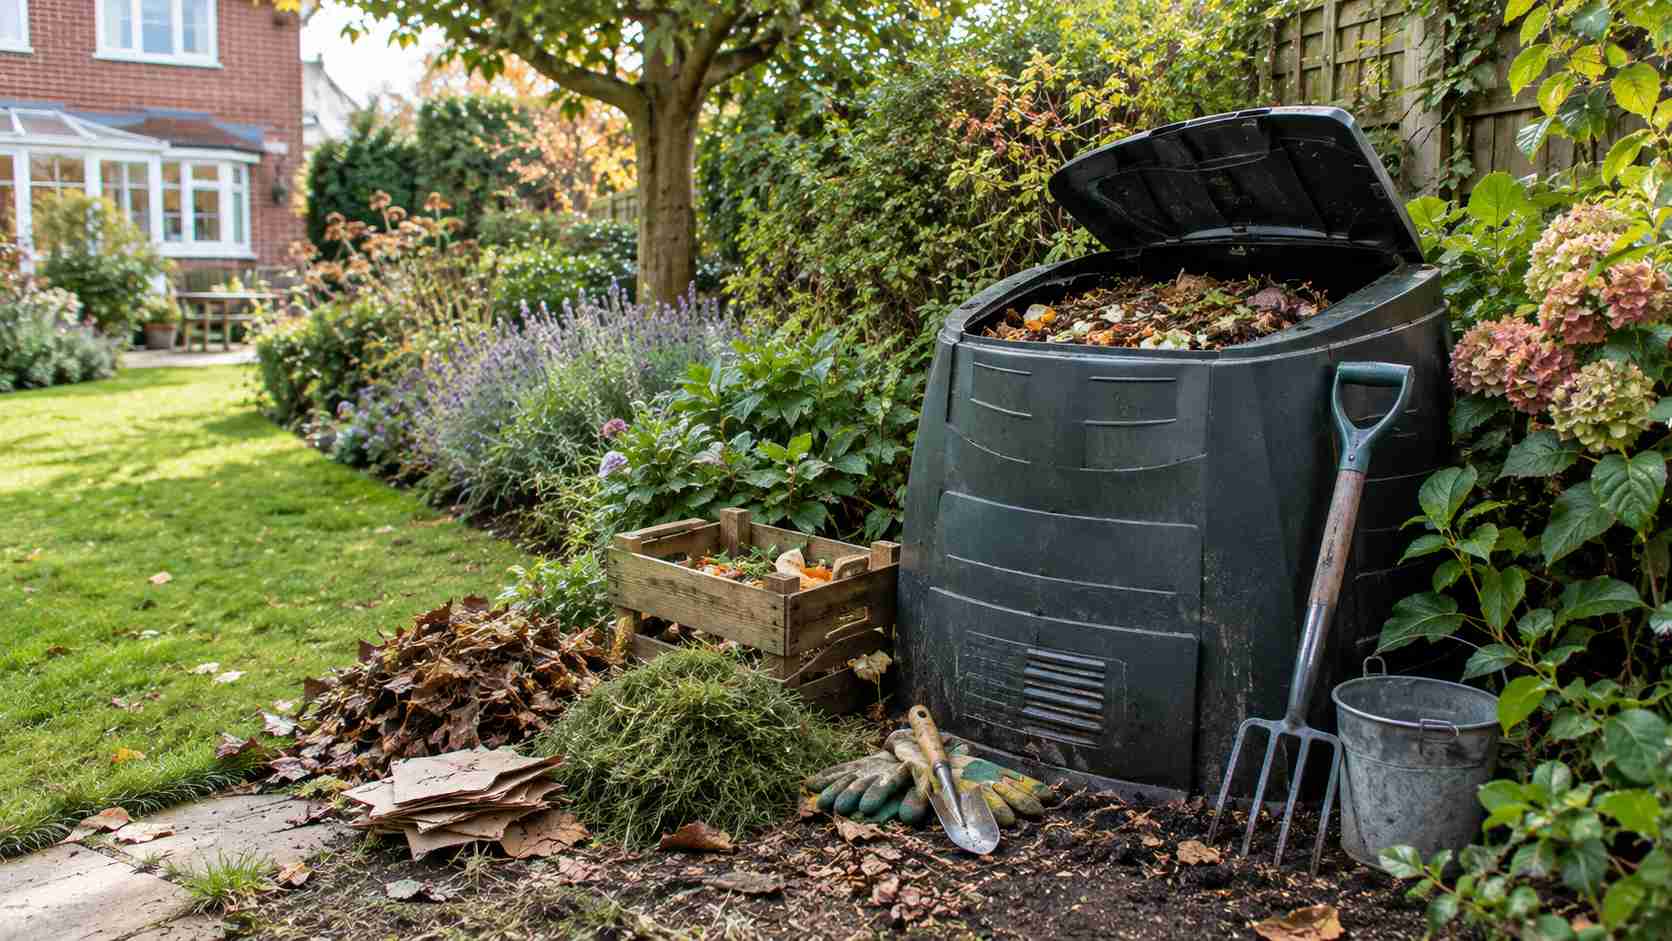
Composting is one of the simplest, most cost-effective things a gardener can do, turning kitchen scraps and garden waste that would otherwise go to landfill into free, genuinely excellent soil improver. It's also one of those gardening jobs that looks more complicated from the outside than it actually is, most failed compost heaps come down to one or two easily fixed mistakes rather than composting being inherently difficult. This guide covers everything a beginner needs to get started properly, what to put in, what to leave out, and how to troubleshoot the most common early problems.
Why composting is worth doing
Composting reduces the amount of waste sent to landfill, where organic matter breaks down without oxygen and produces methane, a considerably more potent greenhouse gas than the carbon dioxide released through proper composting. On a more practical, garden-focused level, finished compost is an excellent soil improver, adding structure, nutrients and beneficial microbial life to soil that shop-bought fertiliser simply can't replicate on its own.
It's also essentially free once set up, using materials most households already produce daily, vegetable peelings, garden prunings, grass clippings, cardboard, rather than needing anything purchased specially. For anyone with beds, borders or a vegetable patch, a steady supply of home-made compost is one of the best investments a garden can have, at no ongoing cost beyond a small amount of regular attention.
What can go in a compost heap
- ›Fruit and vegetable peelings, cores and offcuts from the kitchen.
- ›Tea bags and coffee grounds, both compost well and add useful nitrogen.
- ›Grass clippings, in moderation, since large amounts can compact and turn slimy if not mixed with other material.
- ›Garden prunings and dead plant material, chopped into smaller pieces where possible to speed up breakdown.
- ›Cardboard and paper, torn or shredded rather than left in large flat sheets, which can block airflow.
- ›Eggshells, crushed, they break down slowly but add useful minerals over time.
- ›Fallen leaves, particularly valuable in autumn and best composted separately as leaf mould if you have the space for it.
What should never go in
- ›Meat, fish and dairy, which attract pests and rodents and can create genuinely unpleasant smells as they decompose.
- ›Cooked food and oily leftovers, for the same pest and odour reasons as meat and dairy.
- ›Diseased plant material, which can spread the same disease to whatever the finished compost is later used on.
- ›Perennial weeds with established roots, and any weeds that have gone to seed, most home compost heaps don't reach a temperature high enough to reliably kill either.
- ›Pet waste from cats and dogs, which can carry pathogens that survive typical home composting temperatures.
- ›Coal ash and treated or painted wood, both of which can introduce chemicals that aren't safe for a productive garden.
The balance of greens and browns
Good compost depends on a reasonable balance between what's often called "greens", nitrogen-rich material like grass clippings, vegetable peelings and fresh plant matter, and "browns", carbon-rich material like cardboard, dry leaves, straw and woody prunings. Too many greens on their own tends to produce a wet, smelly, slimy heap, while too many browns without enough greens breaks down extremely slowly and can end up dry and inactive.
As a rough starting guide, aim for roughly equal amounts by volume, though this doesn't need to be precise, and adjusting as you go based on how the heap looks and smells is a perfectly reasonable way to learn. A heap that smells unpleasant usually needs more browns mixed in and a good turn to introduce air; a heap that's dry and not breaking down usually needs more greens and a bit of water.
Choosing a compost bin
A simple, enclosed plastic compost bin is the most common starting point for beginners, it's compact, keeps things reasonably tidy, and retains heat and moisture better than an open heap, which speeds up decomposition. Wooden compost bays, whether bought or home-built, work well for larger gardens producing more waste, and having two or three bays in rotation lets one heap mature undisturbed while fresh material goes into another.
Tumbling composters, which can be rotated to mix and aerate the contents, suit smaller gardens or anyone wanting faster results with less manual turning, though they typically hold less volume than a standing bin or bay system. Whichever style you choose, position it somewhere with reasonable access for topping up regularly and direct contact with the soil underneath, which allows worms and other beneficial organisms to move in and help the process along.
Hot composting vs cold composting
Cold composting is the more common, lower-effort approach for most home gardeners, material is added gradually as it's produced and left to break down slowly over many months with occasional turning. It's straightforward and requires little active management, but it's slower and generally won't reach temperatures high enough to kill weed seeds or plant diseases reliably.
Hot composting involves building a larger heap all at once with a careful greens-to-browns ratio, then turning it regularly to maintain high internal temperatures that speed up decomposition considerably and can produce usable compost in a matter of weeks rather than months. It takes more active effort and a reasonable volume of material to get going properly, so it tends to suit more experienced gardeners or anyone with a larger volume of waste to process quickly.
Common composting problems and how to fix them
- ›A smelly, slimy heap usually means too much wet, nitrogen-rich material and not enough air, mix in dry browns like cardboard or dry leaves and turn the heap to introduce oxygen.
- ›A dry heap that isn't breaking down needs more greens and a bit of water, a heap that's too dry simply won't decompose, regardless of how long it's left.
- ›Flies and pests are usually drawn to exposed food waste, burying fresh kitchen scraps under existing material rather than leaving them on the surface largely solves this.
- ›A heap that seems to be doing nothing at all often just needs turning, this reintroduces air and mixes outer, slower-to-break-down material into the warmer, more active centre.
- ›Compacted, waterlogged material, often from too many grass clippings added at once, needs breaking up and mixing with drier, coarser material to restore structure and airflow.
Using finished compost
Compost is ready to use once it's dark, crumbly and has an earthy smell, with no obvious trace of the original food scraps or plant material, this typically takes anywhere from six months to a year or more depending on the composting method and how actively the heap has been managed. It can be dug into borders and vegetable beds to improve soil structure and fertility, used as a mulch spread over the surface of beds to suppress weeds and retain moisture, or mixed into potting compost for containers.
Compost that's finished but still has some larger, unbroken pieces can simply be sieved, with the coarser material returned to a new heap to continue breaking down rather than discarded. There's rarely such a thing as too much finished compost for a garden, most beds and borders benefit from a fresh layer worked in or applied as mulch every year.
Composting for a healthier, more wildlife-friendly garden
A well-managed compost heap does more than just produce free soil improver, it also becomes a genuine habitat in its own right, supporting worms, beetles and other beneficial insects that in turn support birds and other wildlife through the garden. This pairs naturally with the wider principles covered in our guide to making your garden more wildlife-friendly, a compost heap is effectively one more piece of shelter and food-web support alongside hedging, water and thoughtful planting.
In more compact gardens, common across many of the family homes in areas like New Malden and Surbiton, a smaller enclosed bin or tumbling composter is usually the more practical starting point than a full multi-bay system, still producing genuinely useful compost without needing much space.
Building composting into a wider garden plan
For anyone planning a new vegetable patch, raised beds or a wider garden redesign, it's worth thinking about where a compost area will sit from the outset rather than squeezing one in as an afterthought, a spot with reasonable access, some shade and direct contact with the soil works best. Our Garden Design & Landscaping service can plan a compost area in as part of a wider layout, and our Garden Maintenance plans can help keep an established compost system properly turned and topped up as part of routine seasonal care, useful for anyone who wants the benefits of composting without the ongoing hands-on management.
Frequently asked questions
Cold composting, the most common approach for home gardeners, typically takes six months to a year or more. Hot composting, which involves more active management and regular turning, can produce usable compost in a matter of weeks, but needs more effort and a decent volume of material to get going.